Advanced - Brush Crafting
"Brush Crafting" is one of the craziest things you can possibly do in Unreal, and I think I speak for everyone when I say that it takes a lot of know-how and skill to do it right.
This is more of my own coined term for what most would probably call complex brushes out of the tendency for such brushes to be rather simple. I attest that this is inaccurate and these types of brushes which I am referring to should be within their own category for the work and specialty behind them.
Complex brushes, by definition, are essentially non-primitive brushes composed of primitive brushes (as the geometric equivalent is described). This is why super-complex brushes require their own definition; they are brushes composed of other complex brushes.
Firstly, I'd like to make note that Brush Crafting is rather rare. Although I am not the only one who does this, as there are a handful of experienced level designers of Unreal Engine 1 that have created these before, I might at least have that --out of noticing the relative simplicity of other designers' creations-- I took this to a new level, which is where the super-complex brush is distinguished from the more common complex brush. Some examples of normal complex brushes can be seen in Shinigami Pack 1 by Shinigami, Xidia Gold by Team Red Nemesis, and Legacy by EZKeel.
Before we get into the methods for this, I'd like to point out a few critical points:
Brush Crafting is dangerous! If you carve out or mold your super-complex brush incorrectly, it is highly likely that you will end up with a torrent of irregular BSP cuts if not a heavily deformed map.
Brush Crafting requires experience and/or knowledge of geometry and physical behavior with respect to the Unreal Engine; the lack thereof will probably be an issue for you.
It is probably better in many cases to use 3D Studio Max, Maya, et cetera and later import the converted model file into Unreal, thereafter turning it into a brush. I for one don't particularly enjoy going through the model conversion pipeline. Sometimes, this is actually more rewarding, in my opinion.
Method 1: Carving
This method of Brush Crafting is done by using subtraction as the primary method of design when creating the super-complex brush.
This is the most difficult, yet perhaps the most rewarding method in my perspective.
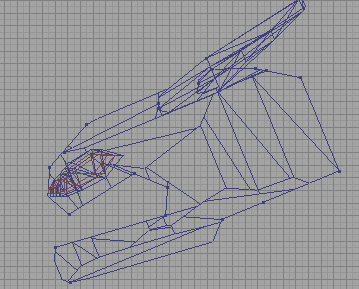
Step 1: Before anything else, we'll have to create a blueprint of what we want. Note the similarity to modeling except with restraints.
![[BluePrint]](http://xoleras.com/sites/images/mBrushCraft/krallfaces.png)
If you have difficulty with this, try getting two-dimensional perspectives of the object you are attempting to design. Note also that this is usually meant for a face or something of that nature of complexity. Here, I am going to design a Krall head.
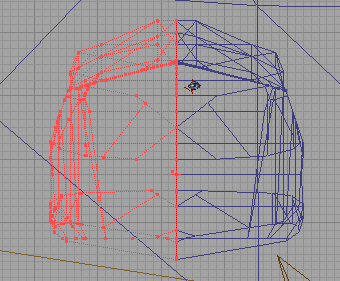
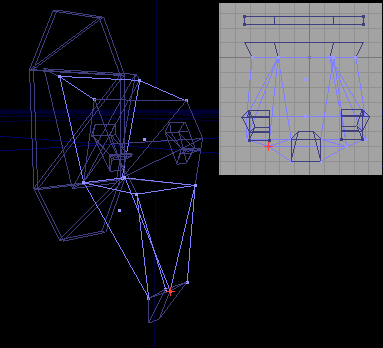
Step 2: Once you've finished sketching your design, it's time to set up a basic ball of clay, as it were, in order to carve out the design. Seldom should you ever use primitive brushes to do this; instead use the 2D Editor.
![[2D Image]](http://xoleras.com/sites/images/mBrushCraft/krall2d.png)
Step 3: Now that we've a basic figure to work with, add it into a level, preferably a blank map with a large subtracted space for you to work with. Note here that you should use an extrusion depth half the length you want your figure to be; working with half of the figure is geometry-friendly and symmetry sometimes avoids BSP oddities.
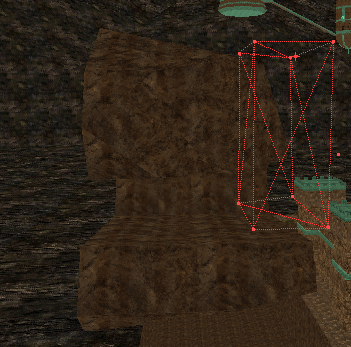
Step 4: The two tools you are usually going to use are the Tesselated Cube and the 2D editor to literally carve out the ugly chunk of a brush that you've added from the 2D editor. That is, you will shape your tesselated cube or 2D-based brush around your base brush, carving around it in order to acquire the shape you want.
This is where harshness and hard work simultaneously involve themselves; as it is the most mentally demanding part. I shan't say there's one or two methods to performing this, as you might discover your own, but here is what I do: notice how, with respect to the eight vertices of a tesselated cube, you can draw two dimensional shapes over your sketch or 2D image in such a way that you are carving out from the square-like 2D base brush. Don't get it? I'll show you:
Think of it like carving a chunk of wood, except that you are restricted to using only a 2D editor and a tesselated cube. Note that it's helpful to move step by step; an attempt to use a complex brush or irregularized cube in order to subtract parts of the brush will usually be a lot more difficult. Think in terms of two dimensions. It takes thinking power and patience but it can be done. Once you've finished the whole half of the brush, you'll want to transform the X or Y axis and add the other side, making a perfectly symmetrical figure.

Step 5: Once you've finished your super-complex brush, it's time to intersect it and add it as a new brush. Remove the excess shaping brushes, or save them in another map for future use (which I recommend in case you need to re-do your brush).
Step 6: You can polish your brush with finishing touches. Perhaps you might want to round it out a little bit more and make it appear more realistically pleasing, et cetera.
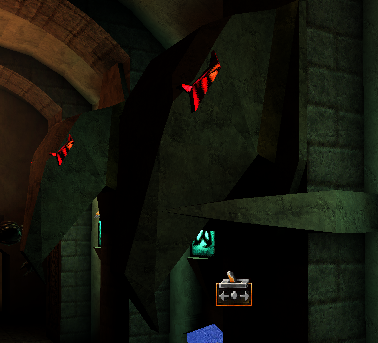
Step 7: Voila! This is very difficult work, but, I must say, the payout is often rather amazing.
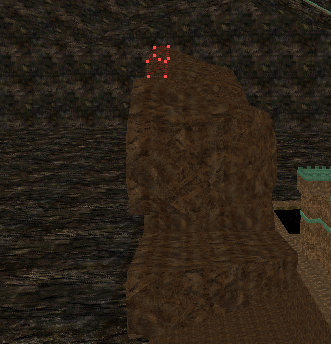
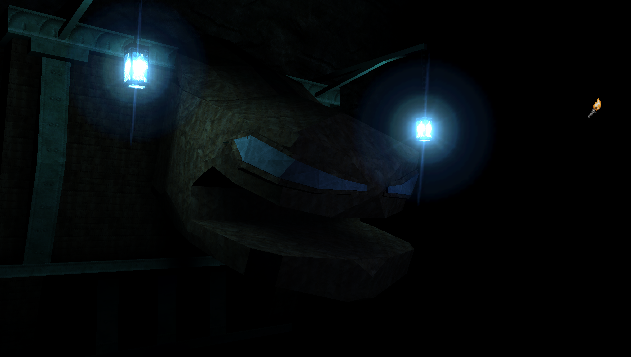 If you'll notice I ended up adding additional brushes for the eyes. This is difficult to explain because it really depends on what you're making --that is, what kind of head, how the eyes are shaped, and so forth. Generally, you should flatten out the eye in a sketch as though it were a skin texture, and afterwards make a 2D brush of that sketch, and wrap it around the face as you see fit. Generally the eyes will be separate brushes, and you'll probably want to consider semisolid brushes in some cases.

Method 2: Aggregation
This method is rather easy in comparison to the previous, though there is a drawback: because this method uses more basic brushes in order to create the figure, it is not very extensive and does not commonly result in amazingly complex brushes. In fact, this generally does not even result in a super-complex brush.
Step 1: Begin by sketching a two dimensional Side, Front, and Top view of your figure. You'll generally want it to be as linear as possible to avoid meticulously small brushes.
Step 2: Either, A. Use the 2D editor to create a base brush with which you can mold your figure, or begin by creating a foundation with a tesselated cube, upon which more altered cubic brushes shall be added.
Step 3: Begin to shape your figure according to the sketch you drew.
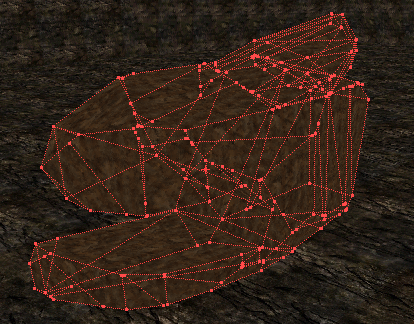
Step 4: Use the vertex editor to move the vertices of each tesselated cube or 2D-based brush in a connected fashion. Notice below how each part of the figure is a different, irregular tesselated cube.
Step 5: Once more, add some finishing touches to your brush. You may notice that the eyes on this figure are rather complicated in appearance, although they are simply 2D-based brushes with minor alterations. A larger depth in extrusion allows for easier placement of the eyes.
Step 7: Done! Place your brush where you want it and bask in its glory! 
Be mindful of a few things while placing these complex or super-complex brushes where you might want them. Though if done well and efficiently, these brushes should not be too much of a hassle, they can, in the presence of mistakenly or badly built geometry, account for a number of BSP errors and visual issues in your levels. However, if done right, I'd say it would appear like a trophy on your shelf. And might one, for whatever reason, criticize you for going to such great lengths, remember:
Fortune favors the bold. -Latin Proverb